Using Diagonal Cuts to slope your shower floor - Planning Guide
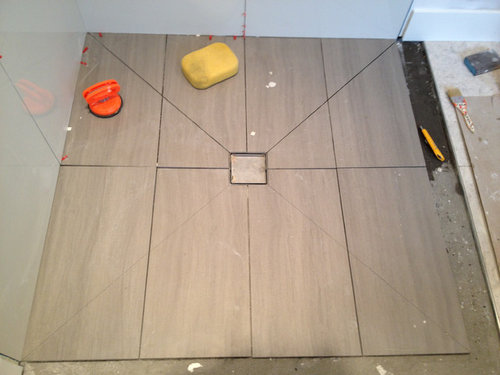
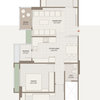
There are many ways to do this installation when a smaller tile is used like a 1"x1" tile, 2"x2" tile or even a 4"x4" tile but when the tile size is 12"x24" it's a little harder. I worked on many different tile layouts for this shower and settled on this one. Looking at the shower floor it's important to remember that this type of install requires greater skill and more care with the cuts to make it look just right.
Every single tile on the shower floor has at least one or two cuts on it. We even needed to reduce the width of the floor tile so that two tile set would meet the larger white tile's grout joints. When working with such large format tile you might think that this makes things easier but we find that the opposite is true and the larger the tile the harder it is to make for perfect shower grout joints.
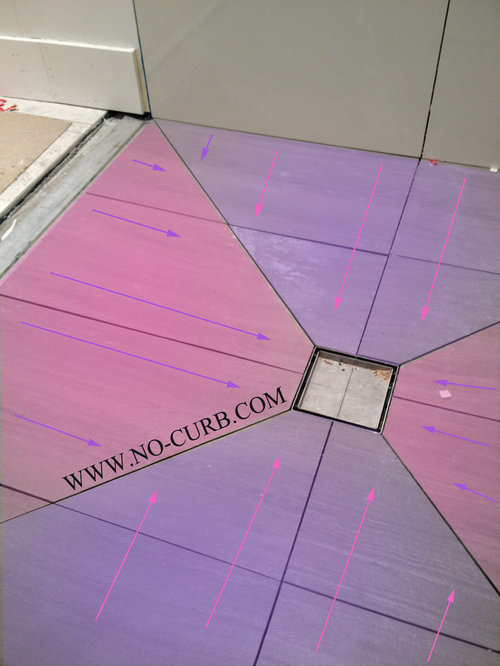
I shaded this picture to highlight the tile layout's pitch or grade to the shower drain. Notice how the pitch runs in only one direction. This means water hitting the tile say by the WWW in the picture above would run towards the WWW then follow the grout line to the shower. The extra diagonal cuts allowing me to set large format tile into a shower with a regular point drain.
California Faucets makes the nicest point drain in this type of shower drain. I do not care for their CeraLine linear drain at all but the point drain or Style Drain is a great product. This type of install also works for linear drain installations and by stretching the shower wider you could insert say an ACO Tile Insert Drain and achieve the same kind of design.
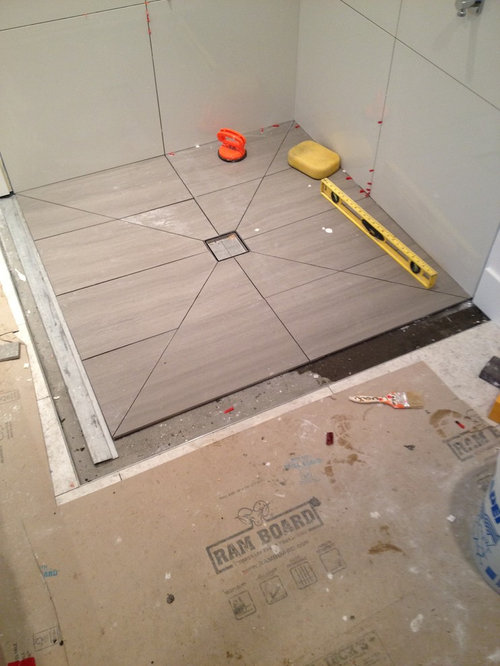
We dry fit the tiles (after they where cut to width) and then pencil in the cut line. I like to set section by section to ensure the tightest grout joints and most even look.
You can see the care taken to get everything just right. Levels. Straight Edges. Ram Board for the floor protection. You might be wondering why there is a gap between the new tile and the shower floor. This gap is to create a slope outside the shower to the wet zone. This shower offers up a few other safety features and I will discuss them in a later blog post.
These tiles are set with a 1/8" grout joint. I do not like working with smaller grout joints since they offer up less adjustment and no forgiveness if the tile is slightly out of true.
Comments (6)
 PRO
PROBy Any Design Ltd.
Original Author10 years agoIt's important to set the tile so it's a hair above the height of the drain where it meets the drain. This way the water does not get hung up or any soap scum can flow into the drain. For this shower I used a rapid setting grout from Mapei called Ultra Colour Plus and I did two passes. One the first day and a second final pass the second.
I have worked with the California Faucet drain knock offs from both My Shower Grate Shop and Luxe. In a nutshell they both "Suck" compared to the California Faucet's version. I have had three "Air Locks" using these type's of drains (One from Luxe and Two from My Shower Grate Shop) and think if your going to go for this look you best not take chances with an second rate product. If your drain does develop an "Air Lock" this flaw can be fixed with a little TLC and a diamond coring drill bit. I can talk about that more later.
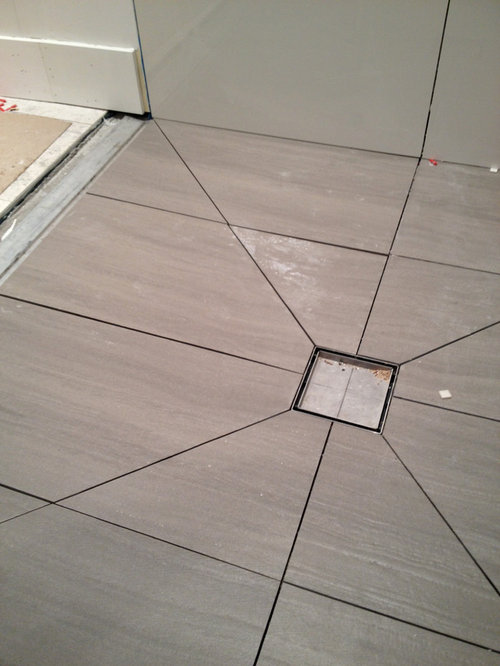
The cuts in this shower where made with a wet saw. Then the cuts where polished to create new factory edges. Night and day difference in looks compared to a tile setter using a snap cutter. If you're looking for a European Install Look - make sure your tile setter understands that this needs to be flawless - when it's close it's not good enough.
"When it's Perfect. It's Good Enough" - JW
There are many tile insert drains on the market. How they are made varies greatly. What type of steel they uses also varies. Careful which drain you buy. I have installed these tile insert drains (linear and square) from companies like Quick Drain USA, Luxe, My Shower Grate Shop, Some random UK company and Quartz by ACO. There is not comparing the ACO liner tile insert drain to the rest - the ACO drain blows the compention away with this particular drain.
How easy the drain is the clean is one of the key steps in choosing a drain. Will the drain rust? You might not think this but I have had rusting drains after only a few weeks of use (not the ACO or Proline products). Careful - sometimes to good to be true, is to good to be true.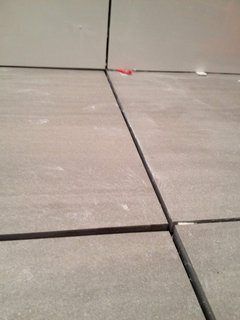


Jacy Garrison
5 years agoWhat do you use to polish the edges of the tile after making your diagonal cuts to get a new factory-looking edge?

Carlo Angelo Sobretodo
3 years agoWe actually rarely see this done anywhere else 😅 especially in hotel projects if you cut that tile diagonally the client will surely reject it

saminac
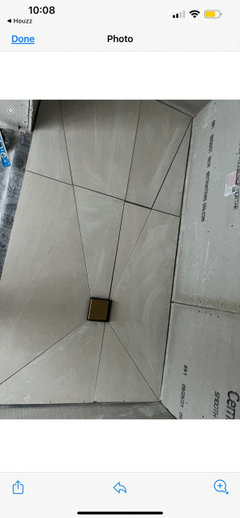
2 years agoAny suggestions here? We have large format tiles with a curbless shower and off-center drain in a pretty small room. The attached picture is the first “botched” attempt. We want to have a good plan before trying again. Goals are to achieve the correct pitch while minimizing grout lines. Currently attempting with a square drain but could easily switch to a linear drain. The only thing we have been able to come up with is this design with different, asymmetrical angles.

Gene Hug
2 years agoIve searched many sites looking for what youve provided.. after looking at your layout, you could have eliminated the cuts on the center tile that cut into the drain (but itwould have required add diagonal cuts on one sheet) and still maintained your pattern. great job!

By Any Design Ltd.Original Author