My client/friend had a tiny budget of $200 to makeover his equally tiny 20 ft2 half-bath and he asked for my help. Luckily he was happy with the neutral color palette so no painting necessary, but he did want to update the look by adding a touch of warmth and elegance, and he also wanted to have more storage.
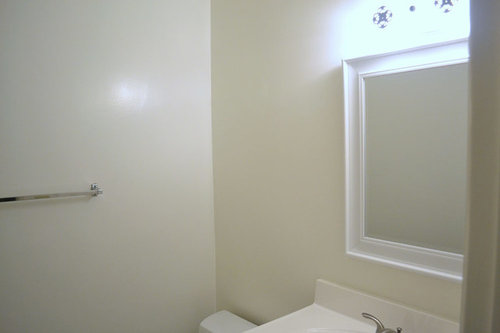
This is what the bathroom looked like before - very plain with a very dated lighting fixture.
Here’s the plan I came up with for the makeover:
- Add a contemporary tile backsplash above the sink area and change the mirror
- Upgrade the lighting fixture
- Add a storage cabinet above the toilet
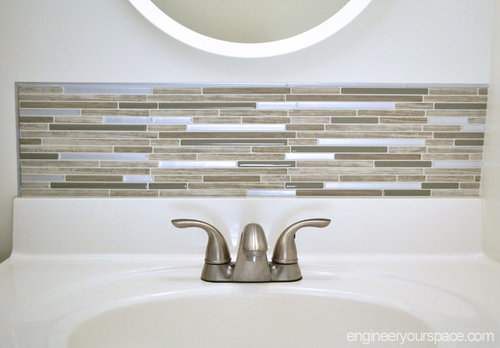
1. Backsplash
The first thing I tackled was the area above the sink. To avoid making a mess and to make this project go faster, I used Smart Tiles peel and stick tiles for the backsplash. This went a long way to add that touch of elegance to the bathroom.
I only needed a utility knife and a ruler to cut the tiles - really easy. I made a video of the entire makeover that also has lots more tips on how to install these tiles.
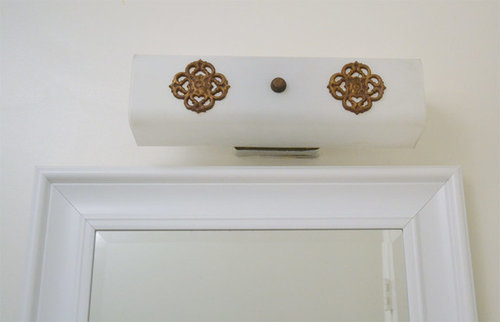
2. Lighting Fixture Upgrade
The next thing I tackled was the dated light fixture, that also happened to be off-center.
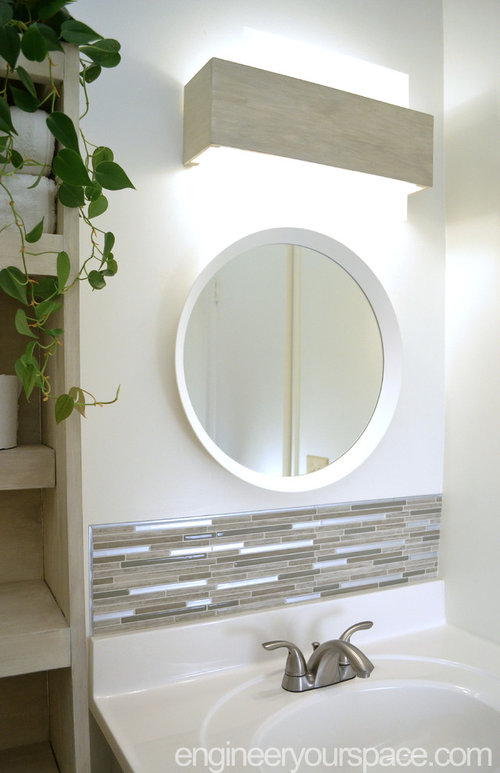
There wasn't enough money in the budget to replace the fixture so instead, I removed the existing cover and made a new one with 1/4" pine boards and square wood dowels. For the light diffuser, I used a plexiglass panel that I covered with white fabric and glued that to the back of the wood cover.
I also painted the wood with chalk paint, wood tint and protected with white wax. The cover was light enough to install with 3M command strips, and it was long enough and big enough to center over the vanity to make the light looked centered even though it isn't.
You would never know that there's an ugly light fixture hiding behind there! You can see how I made the entire light fixture cover for less than $15 in this video.
3. Storage
For storage, I built a custom "over the toilet" cabinet (you can see how I built it using only hand tools, 1"x2" and plywood in this video.)
For finishing touches, I hung inexpensive abstract artwork from Target ($20) on the back wall and I changed out the mirror above the vanity for a round mirror from IKEA (LANGESUND $28).
My friend was beyond thrilled with the end result, and so was I, especially since the whole bathroom remodel came in at $189, $11 under budget!


 PRO
PRO PRO
PRO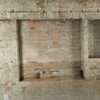
Gargamel