


The Ultimate Guide to a Sparkling Clean Kitchen
Tackle food messes with this comprehensive collection of targeted and tested cleaning methods
Mitchell Parker
13 January 2019
Houzz Editorial Staff. Home design journalist writing about cool spaces, innovative trends, breaking news, industry analysis and humor.
Houzz Editorial Staff. Home design journalist writing about cool spaces, innovative... More
Your kitchen probably saw a lot of action during the holidays. How that splatter of mashed sweet potatoes got on the ceiling is anyone’s guess. But that mess just means it’s time for a deep cleaning. Here we round up a collection of cleaning guides that, if followed, will help you get your countertops, appliances, floors and more shining like new.

Appliances
A good portion of your deep-cleaning efforts should focus on the areas that see the most impact from spills, splatters and the like.
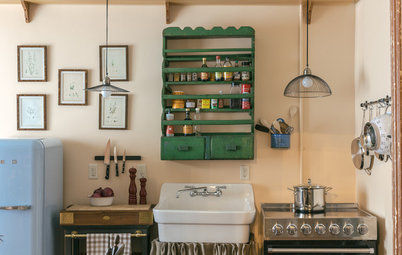
Refrigerator
Few appliances get out of hand as quickly as the fridge. Leftovers, forgotten food, leaky containers – before you know it, you’ll dread opening the refrigerator door to grab some coffee creamer in the morning.
How often
Many experts recommend a top-to-bottom cleaning every season but at least twice a year.
Begin by taking all the food out of the fridge and placing it in a cooler. Then remove the shelves and drawers and set them aside. Use a baking soda and water solution to wipe the inside thoroughly. Got stubborn, sticky spots? Try a non-abrasive scrubbing tool or put warm, wet paper towels on top to loosen the spot.
A good portion of your deep-cleaning efforts should focus on the areas that see the most impact from spills, splatters and the like.
Refrigerator
Few appliances get out of hand as quickly as the fridge. Leftovers, forgotten food, leaky containers – before you know it, you’ll dread opening the refrigerator door to grab some coffee creamer in the morning.
How often
Many experts recommend a top-to-bottom cleaning every season but at least twice a year.
Begin by taking all the food out of the fridge and placing it in a cooler. Then remove the shelves and drawers and set them aside. Use a baking soda and water solution to wipe the inside thoroughly. Got stubborn, sticky spots? Try a non-abrasive scrubbing tool or put warm, wet paper towels on top to loosen the spot.
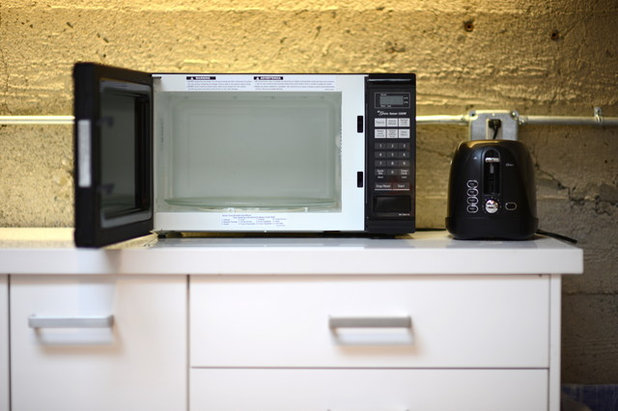
Microwave
Food splatters are a fact of life when using this appliance. Even if you can live with seeing a mess every time you nuke your burrito, know that food particles can eventually make your machine run less efficiently. And nobody wants a cold burrito.
How often
Daily maintenance. Steam clean once a week.
Prevention is the name of the game here. Cover your food to minimise splatters, and wipe the inside of your microwave daily with a wet sponge or towel before food has a chance to harden.
For more stubborn spots, try heating about 1 cup of water in a microwave-safe container on high for two to three minutes. The steam should help loosen the caked-on spots. Next, use white vinegar to wipe out the inside. Also, make vacuuming your microwave’s vents part of your vacuuming routine.
Here’s how to make your own household cleaning products

Range and oven
This appliance probably took the brunt of your holiday cooking messes. It’s not the easiest or quickest thing to clean, but as the star of your kitchen, it’s necessary.
How often
As needed.
Remove the burners and trays and soak them in soapy water for 20 minutes, then scrub clean with a sponge. Wipe down the stove-top.
For the oven, remove the racks and soak them in sudsy water in your sink, then wipe clean with a sponge. Look to your owner’s manual for the right cleaning method for the oven, but you can begin by vacuuming out the crumbs on the bottom and wiping the inside with a damp sponge. A commercial oven cleaner will be your best bet but there are alternative solutions as well.
As a daily preventative measure, try putting parchment paper on the bottom to catch drips and spills and change out as needed.

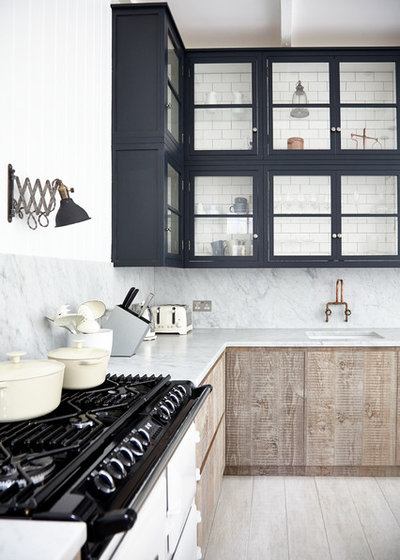
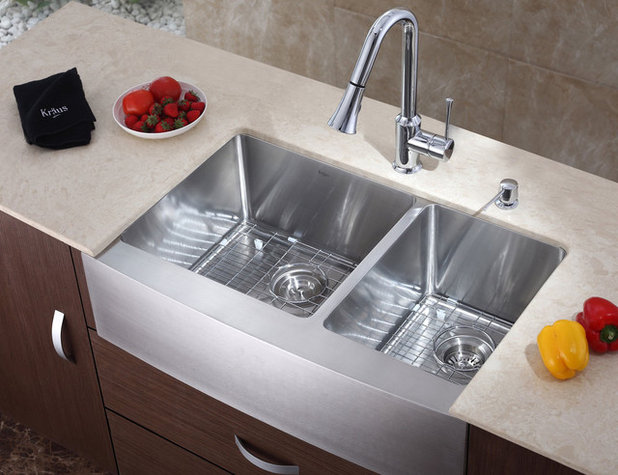
Stainless steel
Stainless steel appliances continue to be the norm in most kitchens. While its name implies a certain built-in cleanliness, steel surfaces, including countertops, are still prone to rust and stains.
How often
Daily.
Use soft sponges and microfiber cloths to wipe steel surfaces. Avoid steel scouring pads, which can scratch surfaces. For tough spots, use plastic scrubbing pads.
For brushed or polished steel surfaces, always wipe and scrub with the grain direction. Use diluted vinegar, baking soda, alcoholic solvents and chloride-free glass sprays elsewhere.
Here’s how to let your kitchen sizzle with steel
Countertops
Spots and stains on countertops are probably the most visible and pressing messes in your kitchen. Each material is different, so do some research before you break out the abrasive cleansers, which could damage your countertop beyond repair.
Marble
Few materials offer the subtle beauty of marble. But it comes with a price, both in terms of cost and maintenance. Etching from lemon juice, alcohol or tomato sauce can wreak havoc on your precious marble surfaces.
How often
Daily. Seal once a month.
First, avoid acidic substances coming into contact with your countertop. That includes cleaning products but also vinegar, lemon juice and bleach.
To clean, just use mild soap, water and a non-abrasive sponge. At least once a month, experts recommend applying a spray sealer to help reduce stains and etching.

Granite
Still the most popular countertop material, granite is relatively easy to keep clean.
How often
Daily. Seal every year or two.
You can get by with using a soft cloth and warm water, or cleansers made specifically for granite. Every year or two, seal your slab with an impregnating water-based sealer made for granite.
You’ll still want to avoid acidic cleaners and citrus when possible. And don’t use steel wool, which can scratch most countertops. Plus, never place a hot pot or pan on a countertop surface. Always use a trivet for protection.

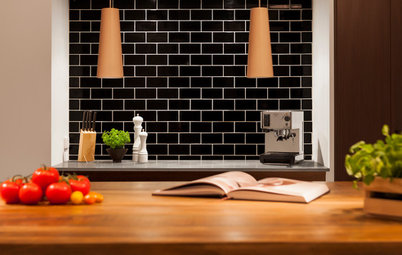
Butcher block and cutting board
Even if you don’t have full butcher block countertops, chances are you’ve got a hefty cutting board that needs cleaning.
How often
After each use. Oil as needed.
Unlike, say, laminate surfaces that take awhile for stains to penetrate, wood surfaces require fast acting.
After you’re done cutting or chopping, remove all food waste and scrub the surface with mild soap, then dry it. To disinfect, avoid chemical cleaners whose residues can taint food. Instead, use undiluted vinegar.
For tough stains, try lemon with table salt, or baking soda. Over time, your wood may need an oil boost. Spread it evenly, let sit for 15 minutes, then wipe off any excess with a clean towel.
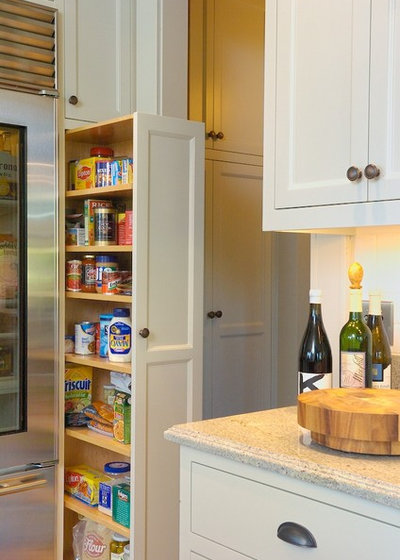
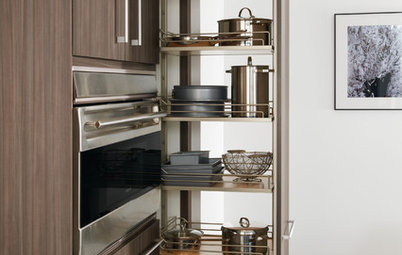
Pantry
It’s hard to feel like you’re operating in a clean kitchen when you know a huge, disorganised mess lurks behind your cabinet doors.
How often
As needed.
Begin by taking everything out and sorting by what you want to keep and what you want to donate. Then wipe down all the shelves and walls to remove stains and any food crumbs. This is a good time to assess what you can do to improve storage and organisation.
Take a look at different pantry types
Walls
Walls see a fair share of abuse from splatters, scuffs and dings.
How often
Every few weeks or as needed.
Start including your walls every now and then in your vacuuming routine. This will help keep dust from accumulating and making the walls look drab.
For spots, wipe clean with a damp cloth. For tougher areas, try a thick paste of baking soda and water.

Floors
A clean floor begins with regular vacuuming. But food stains and scuff marks need a little more attention.
How often
Daily, once a week or as needed.
Laminate floors need a barely dampened mop and small amount of gentle cleanser. For tough spots, you’ll want to get on your hands and knees and work on the spot with a scrubber. The same goes for tile floors, but grout lines will give you more trouble.
Hardwood floors are a different beast and will depend on the kind of finish that’s on your wood: Polyurethane, shellac, wax or varnish. Follow the link below for tips on determining what finish you have.
Reducing dirt by not wearing shoes inside your house is the first line of defense. Next, vacuuming, sweeping and dust mopping with a solution of dishwashing soap and water will take care of the rest.
Disposal of garbage, pipes cleanliness
No matter how clean your kitchen looks, if it smells off, it will feel dirty. Garbage disposals are a common odour culprit.
How often
Let your nose guide you, or every few days.
There are several methods for ridding your sink of stink. Create a pasty liquid with lemon juice and baking soda and pour the fizzing mixture into the disposal. Let it sit for a few minutes. Run cold water and turn on the disposal for one minute.
You can also sprinkle baking soda down the drain, then pour in vinegar and let it sit for about five minutes. Run hot water for 30 seconds and repeat as needed.
Or try cutting up a lemon and placing a slice into each slot of an empty ice cube tray. Fill the tray with vinegar and freeze. Toss a handful of the cubes into the disposal every few days and run it with cold water until they’re crushed.

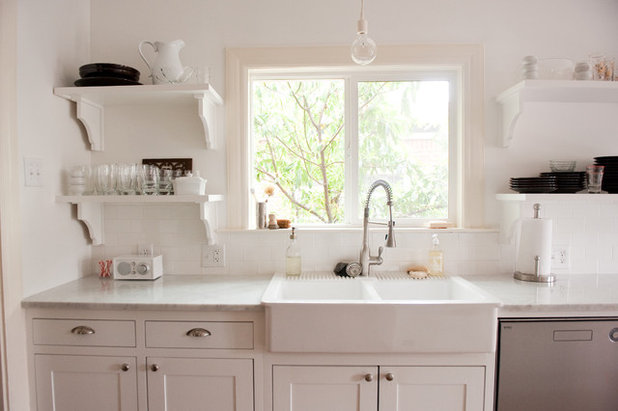
Windows
What good is a view if it’s blurred by smudges and dirt? Don’t leave out windows in your cleaning routine.
How often
Up to you, but two to three times a year is recommended.
Before you begin, make sure you protect your floors, walls and countertops from any drips of cleaning solution you’ll be using.
A solution of warm water and mild dish soap is a safe bet. Use a sponge to scrub down the windows, getting into the creases and corners. Then use a squeegee and wipe dry with a clean towel.

Pots and pans
A dirty pan will make even the most spotless kitchen feel like a mess.
How often
After each use.
Washing by hand with dish soap and warm water after each use is the best way to go, but you’ll want to employ different methods for different materials.
A dirty pan will make even the most spotless kitchen feel like a mess.
How often
After each use.
Washing by hand with dish soap and warm water after each use is the best way to go, but you’ll want to employ different methods for different materials.

Fruit flies
Finally, what good is a clean kitchen if you’ve got fruit flies buzzing around?
How often
As needed.
Fruit flies have to enter your home, so start by making sure your windows and doors are sealed properly. Next, make a trap by pouring some vinegar or red wine into a dish and cover it with plastic wrap. Then poke a few holes through the top and leave the trap out on the counter to attract the flies. The flies will enter and drown or get stuck and die.
As a preventative measure, consider mesh covers or glass containers for your fruit.
Read more:
Kitchen Cleaning Tips: 7 Ways to a Spotless & Fresh Cooking Space
Tell us:
Do you have a specific cleaning routine you follow? Tell us about it in the Comments below.
What are you working on?

Related Stories
Kitchen Ideas
7 Essentials For a Successful Kitchen Renovation
Remodelling your kitchen? Updating cabinets, walls, backsplash, flooring, storage should be a must on your list
Full Story

Kitchen Ideas
10 Key Kitchen Dimensions You Need to Know
Here are key kitchen dimensions that will help you design like a pro
Full Story
Indian Homes
Renter's Dilemma: How to Update an Indian-Style Kitchen Design
Follow these simple, renter-friendly tips to update your space into a modern kitchen
Full Story

Kitchen storage
Say Hello to the Most Popular Types of Kitchen Wall Cabinets
Find out which kitchen wall cabinet style combines convenience and good looks, is easy to maintain and best suited for you
Full Story

Decorating Guides
Is an Open Kitchen Layout Right for Indian Homes?
Explore the strengths and shortcomings of an open kitchen design and find out whether it makes sense in your home
Full Story

Most Popular
What's the Best Material for Kitchen Cabinets?
Choices are aplenty when it comes to cabinet materials. Find the pros and cons of the top 5 available in the market today
Full Story

Lighting Ideas
How to Light Kitchen Counters
By David Warfel
Discover these 6 professional tips for lighting your countertops and other kitchen workspaces
Full Story
Kitchen storage
6 Must-Have Modular Kitchen Accessories
These accessories for modular kitchens are guaranteed to increase efficiency and storage
Full Story

Photo Books
23 Scandinavian Kitchens That Pack Extra Punch
Blonde timber, white details and pared-back designs are key Scandi kitchen looks
Full Story

Kitchen Ideas
Have an Open Kitchen That Can Be Closed Off Too
By Jennifer Ott
Get the best of both worlds with a kitchen that can hide or be in plain sight, thanks to doors, curtains and savvy design
Full Story
Good posts. Thanks for all the feedback. I for one hate under mount sinks. I’ve always had the countertop and sink as one unit. No body told me to dry under the countertop. I should have known tho. Thanks. I did try to clean with a strip of tshirt material rolled up underneath counter. Soaked overnight in a water/bleach mixture. Worked pretty good. Not 100% .. Now I wipe dry like 3x a day.
I agree with marble.. not good for kitchens or baths. Hard to shine and keep beautiful. My opinion.
@buster57 I do have a breville toaster oven and I use it more than any appliance in the kitchen that and my breville espresso machine. I make a habit to wipe it down every other day. I put a thin piece of aluminum foil on the drop scrum insert at the bottom. I have had two of these and the first one got these little brown specks like baked on grime and I could never get them off. I scrubbed until I scratched the metal aluminum. It must be from the convection oven fan just spraying all the cooking juices around.
I just use Mrs Meyers multi cleaner and a micro fiber cloth. On the glass I use those cheap white coffee filter because they are super clean and never leaves lint. Just a simple window cleaner or a dot of dishsoap with distilled water works for my glass on applanices. For the grill I wipe it down with bar keepers friend about once a week .. it does take time and I hate doing it but it is necessary. I use a 3M scrubby I cut it up small so it will fit around each metal rack run. I tried putting in the dishwasher with no luck.
great tips