


Diwali Guide: How to Paint Your Home in 9 Days
Here is how you can go for an express paint job if you have woken up too late this festive season and Diwali is around the corner

A fresh coat of paint can rejuvenate the look of your home but at the same time, the very thought of getting the house repainted (especially if it’s been a while since it was last done) fills us with dread. However, clever planning and an organised approach can considerably reduce the time it takes to paint the house and can make the overall experience more pleasant.
If Diwali is round the corner and you feel you have missed the boat getting the painting of the house done – don’t worry. It can still be done and without having to compromise on the quality and workmanship; here is the day-wise schedule that needs to be followed. Read on and get ready.
If Diwali is round the corner and you feel you have missed the boat getting the painting of the house done – don’t worry. It can still be done and without having to compromise on the quality and workmanship; here is the day-wise schedule that needs to be followed. Read on and get ready.
Day 2: Sand and repair the walls and ceilings
Sand the existing walls and ceilings; fill uneven surfaces, holes, dents, chipped walls or cracks with POP (plaster of Paris) or wall putty to achieve a level surface and smooth wall finish on which the paint colours can settle.
Keep in mind that this stage of work releases maximum dust; as a precaution keep children and older people (or others allergic to dust) away from the site.
Allow the POP and putty patches to dry.
Find a contractor to paint your home
Day 3: Prepare the surface
Sand the POP-treated wall surface till smooth. Demarcate one area for keeping all the tools and make sure that the primer and paints arrive at site. I would advise you to buy the material by Day 3 (for the first phase) and on Day 6 (for the next phase) separately to avoid wastage.
Pro tip: Paint and primer come in buckets, which range between 1 and 20 litres. Note that the cost per litre of paint decreases as the volume increases.
Try the paint calculator option, which is available on websites of premium paint manufactures like Nerolac and Berger. This tool will give you an approximate estimate of the quantity of paint that you require per room, along with materials and standard labour costs.
Day 4: Prime the areas to be painted
Ensure the surfaces are dust-free; use one coat of primer on the walls and ceilings. It seals the surface and forms a good base for the paint to stick to. Keep your windows open so that the space is well-ventilated and lets out the the smell of primer and paint.
Day 5: Sand the primed surface and apply the first coat of ceiling paint
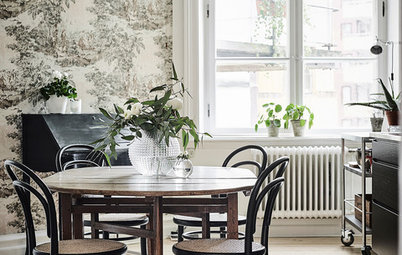
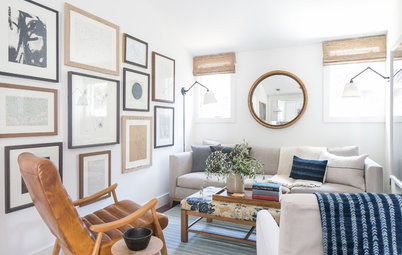
Take a look at more living rooms around the world
Ensure the surfaces are dust-free; use one coat of primer on the walls and ceilings. It seals the surface and forms a good base for the paint to stick to. Keep your windows open so that the space is well-ventilated and lets out the the smell of primer and paint.
Day 5: Sand the primed surface and apply the first coat of ceiling paint
- The primed surface should be given at least 3 hours to dry. For extra smoothness, one could again lightly sand the primed wall or ceiling. Make it a point to constantly remove dust from the home because wet paint acts as a glue to trap dust.
- Apply the first coat of paint on a clean and a dry ceiling. During the painting process, it is essential to finish from top (ceiling) to down (walls) and not vice-versa because paint has the tendency to splash droplets on the walls and floor.
Take a look at more living rooms around the world
Day 6: Complete the second coat of ceiling paint and apply the first coat of wall paint
Day 7: Complete the second coat of wall paint
The first coat of paint on the wall may look thin and lighter than the colour chosen. However, the second coat of paint application brings elegance and provides a uniform finished surface. One must ensure that adequate drying time is given in between the two coats of paint to prevent the formation of a wrinkled surface.
A recent innovation: An express painting service has been launched by some Indian paint brands. This new-age painting technique includes use of vacuum-suction-enabled sanding machines and mechanised tools that not only ensure minimum dust but also finish the painting work in much less time.
- Now apply the second coat of ceiling paint. For long-term durability of paint, allow a minimum drying time of 6 to 8 hours (or more) between the first and second coat.
- Once the ceiling is completed start application of the first coat of wall paint.
Day 7: Complete the second coat of wall paint
The first coat of paint on the wall may look thin and lighter than the colour chosen. However, the second coat of paint application brings elegance and provides a uniform finished surface. One must ensure that adequate drying time is given in between the two coats of paint to prevent the formation of a wrinkled surface.
A recent innovation: An express painting service has been launched by some Indian paint brands. This new-age painting technique includes use of vacuum-suction-enabled sanding machines and mechanised tools that not only ensure minimum dust but also finish the painting work in much less time.
Day 8: Apply oil paint on grill-work
- This is the final day when you must give the finishing touches to the walls and ceilings. Also, if you have opted for a dark accent colour on any wall, it may require an additional coat of paint to achieve the correct shade.
- Apply oil paint on grille-work and woodwork (if any). One could put a coat of varnish on the wooden doors, windows and some furniture for a fresh look.
Day 9: Cleaning and setting of furniture
This story was first published on Houzz India in 2017.
Read more:
The Secret to a Long-Lasting Wall Paint Job
Where to Use Which Paint?
Tell us:
What is the minimum time you have taken to paint your home? What insights can you share?Write in the Comments section below.
- By now all the walls are completely dry. Remove the masking tape from the doors, windows and fixed wooden furniture, and start cleaning. In addition, fit back the electrical fixtures.
- Finally set up your home by putting the furniture back in place. Don’t forget to bring out your new cushions and bedspreads as your home gets ready with its new and updated look.
This story was first published on Houzz India in 2017.
Read more:
The Secret to a Long-Lasting Wall Paint Job
Where to Use Which Paint?
Tell us:
What is the minimum time you have taken to paint your home? What insights can you share?Write in the Comments section below.


Before the painting work starts, check for any kind of water seepage or loose plaster, and repair it immediately. To be able to complete this task in nine days, it is recommended you divide the home into sections of approximately 500 square feet each and assign a team of at least two skilled painters and two labourers (helpers) for each section. The size of your home will decide the number of teams required to complete the job in the stipulated time.
Day 1: Clear the site